Project – Ammo Box(s) Restoration
After having a cuppa and a catch up with a member of the family, listening to their latest adventures from the previous week. They mentioned a family friend who had two chunky wooden WW2 Ammo boxes in need of some tender loving care. Obviously my services had been automatically offered with out my knowing, but its not often i get the chance to experiment with something from such a point in history. So I jumped at the chance, with a big grin on my face to boot. See, Family can be a great source of free promotion for the business too. Wink, Wink!
A couple of days later, the boxes wound their way to my workshop and got to see what challenges i had in store. Two completely different looking boxes, each as visually interesting as the other.
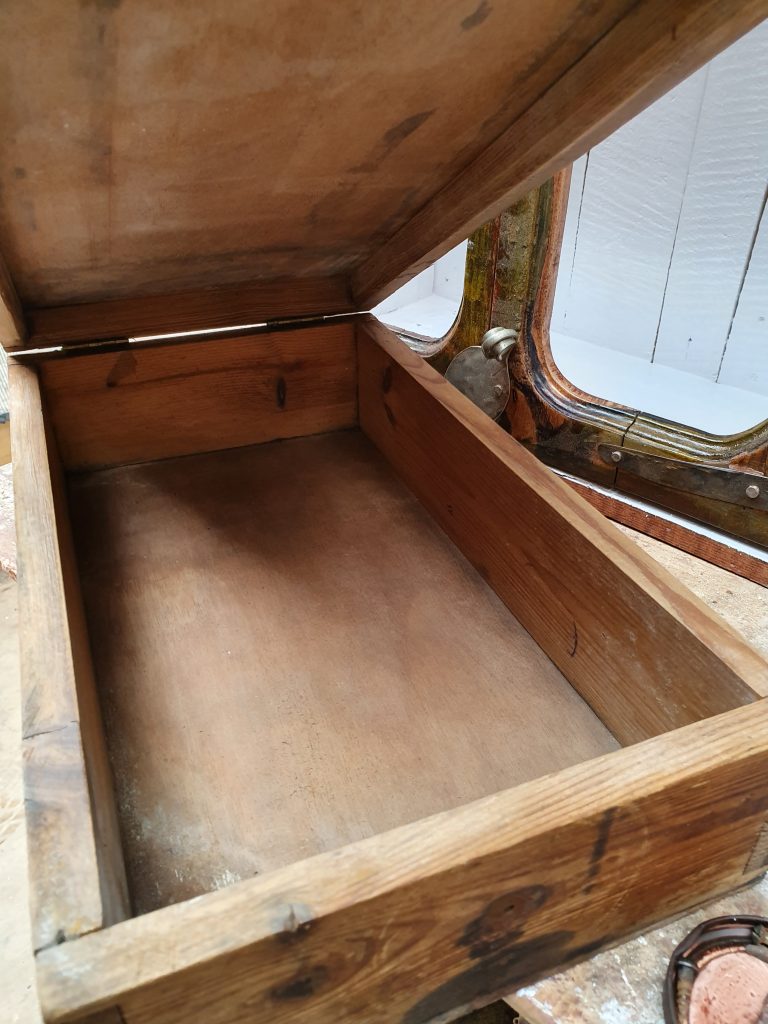
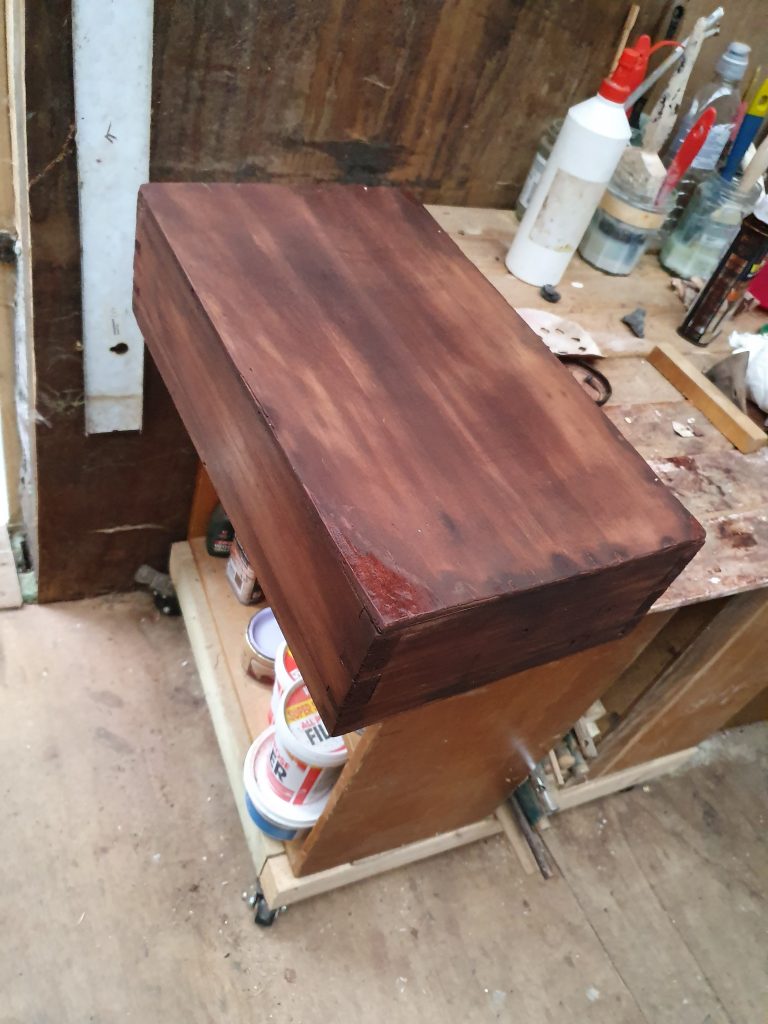
One, a simple design, around 20cm wide, 10cm high and 30cm long. A shallow, but wide box with a rusted hook and eye fastener that had seen better days. Apart from a little peeling veneer on a couple of the corners and fairly stained with what i think was oil, it was good shape all in all. Not sure what ammunition this box had held, but still an interesting item to experiment with.
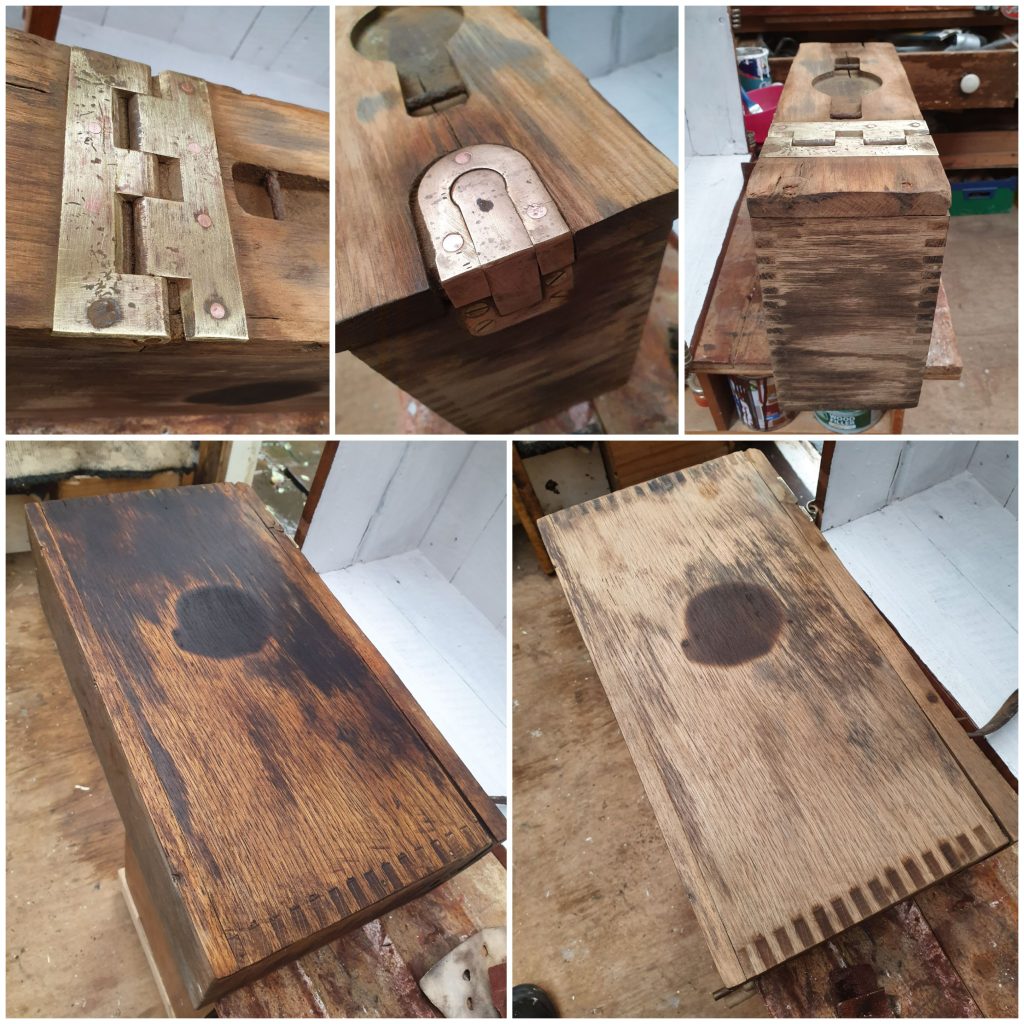
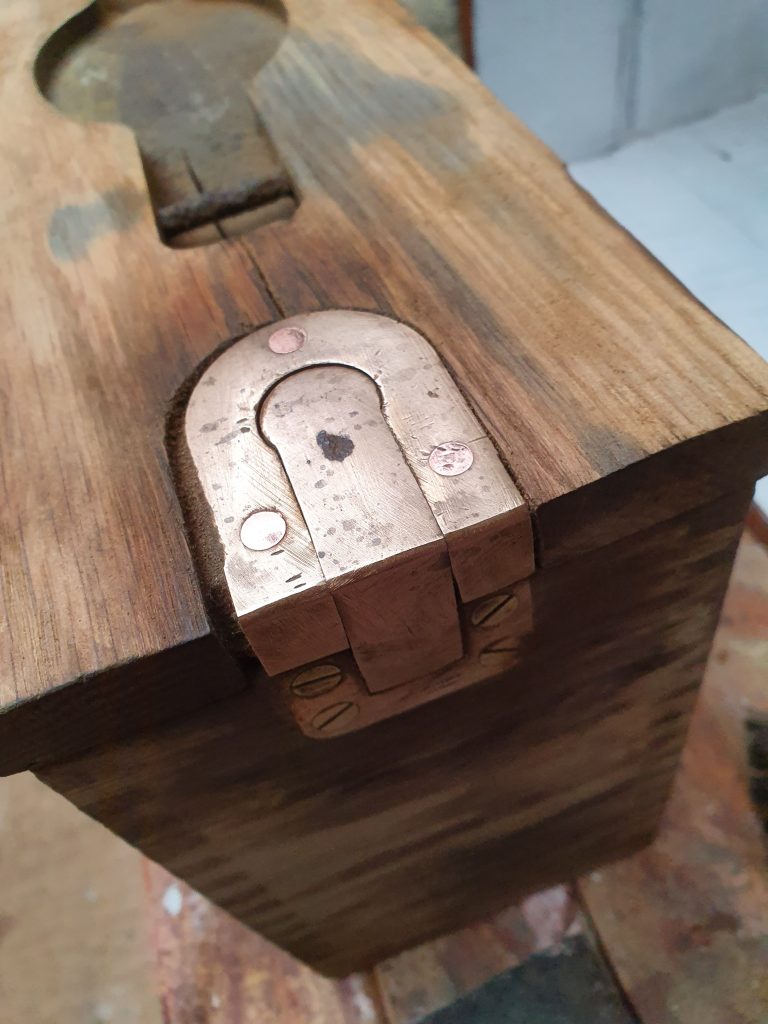
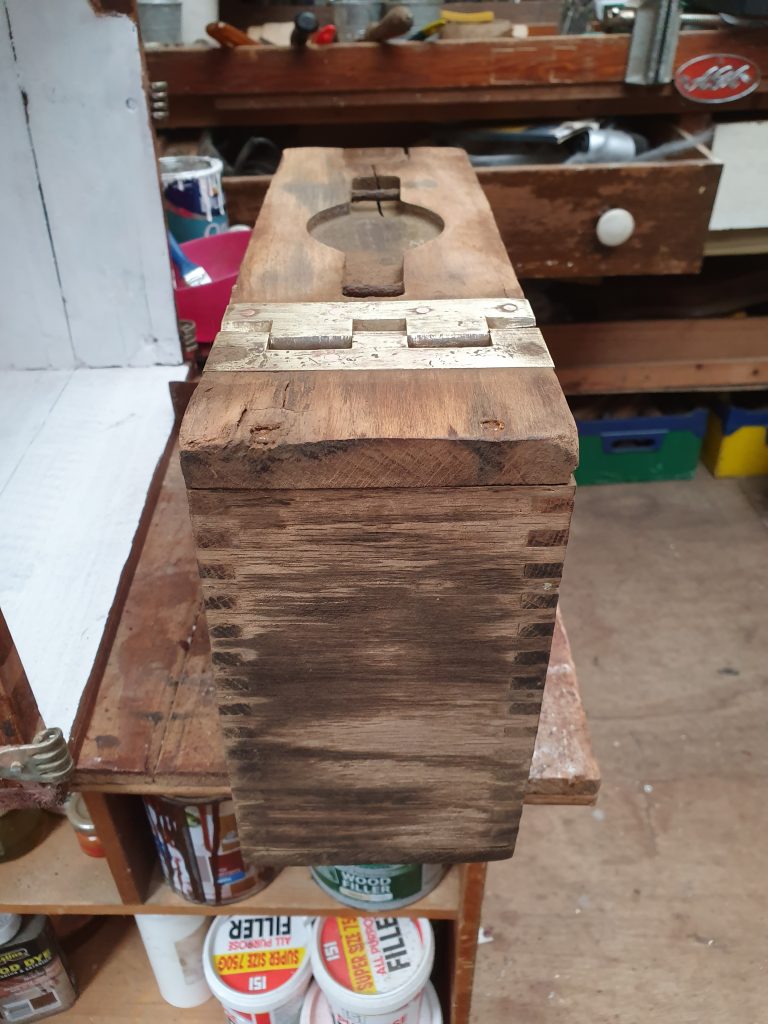
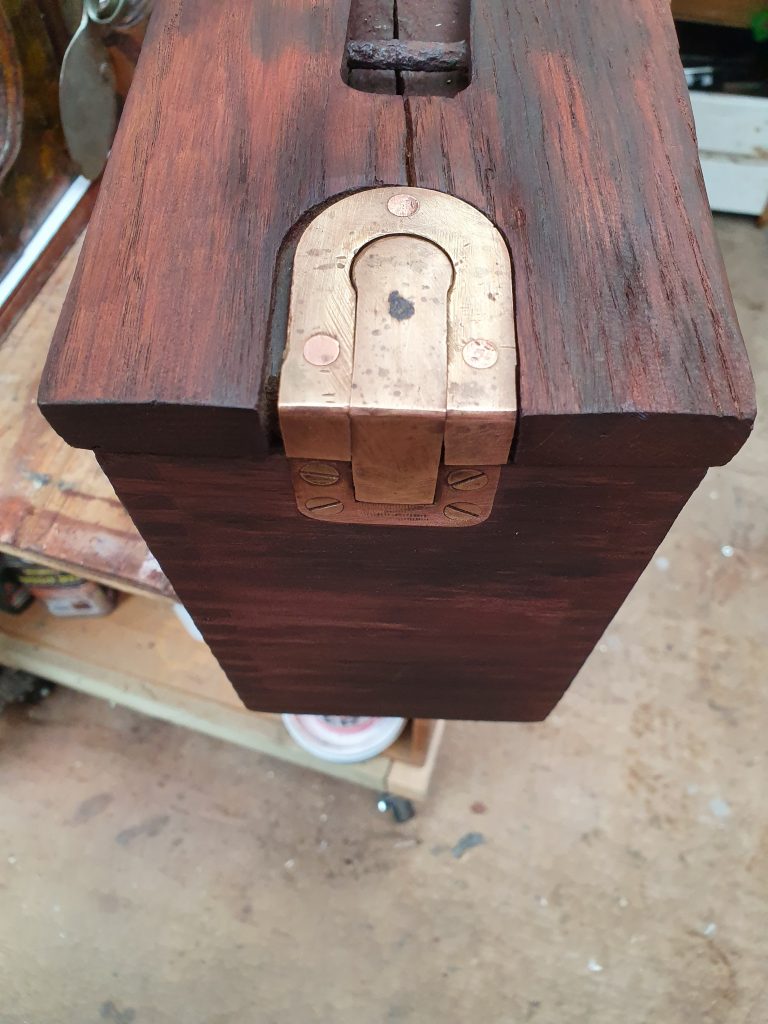
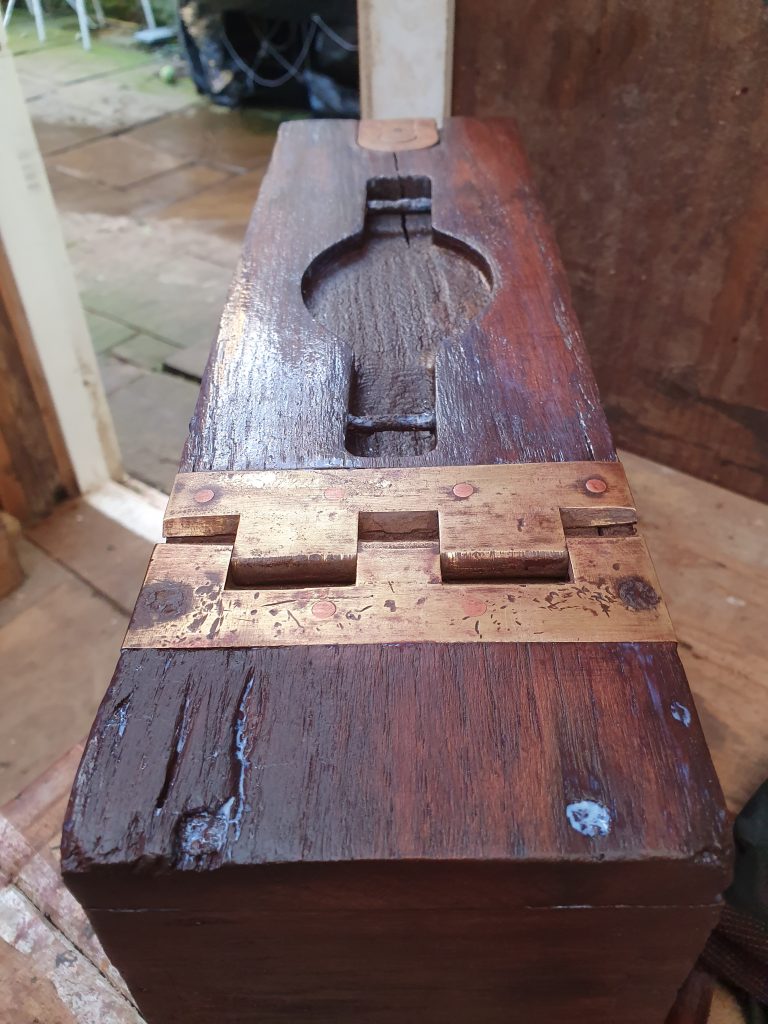
The second, a much more complicated design. Almost exactly the same dimensions as the first, but this time it stood on its side. With a beautiful, oversized Brass hinge and a very clever, push button lock, this looked more like a traditional ammo box. This time, definitely for riffle ammunition, it still had its shell markings in the base of the box. I’m not an ammunition expert, so not sure exactly what type. This boxes condition wasn’t quite as good as the previous, it also had oil stained wood, but nothing compared to what looked like a deep burn mark on one side. This was going to be a challenge, but hopefully worth all the time and effort. We shall just have to see….
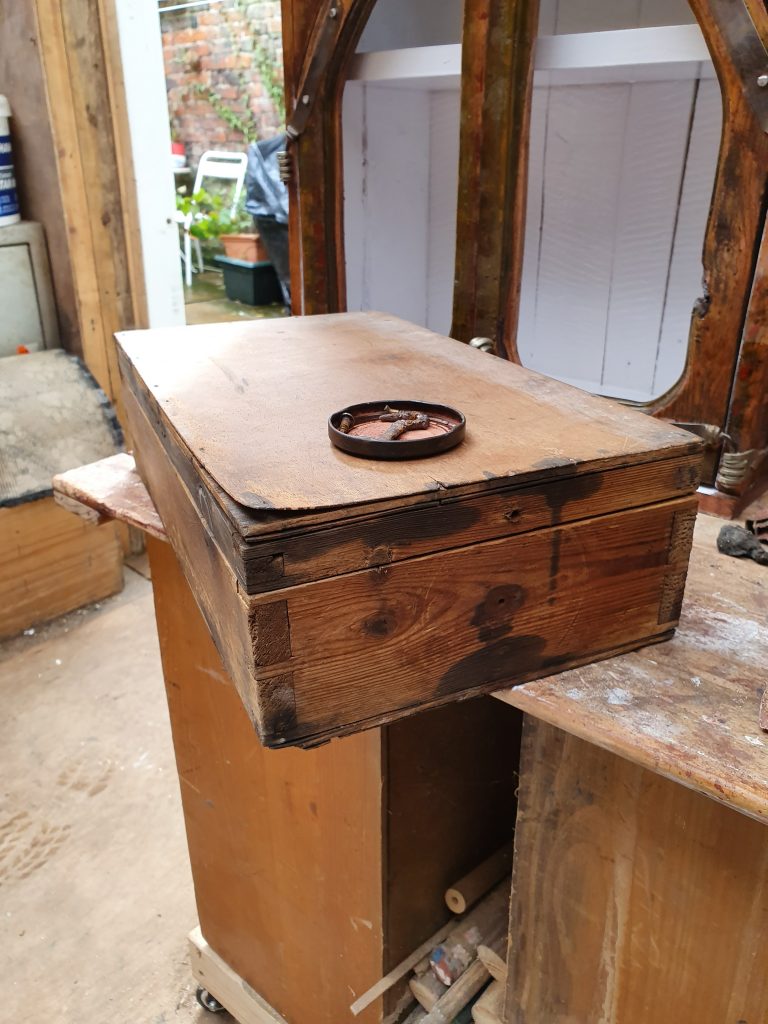
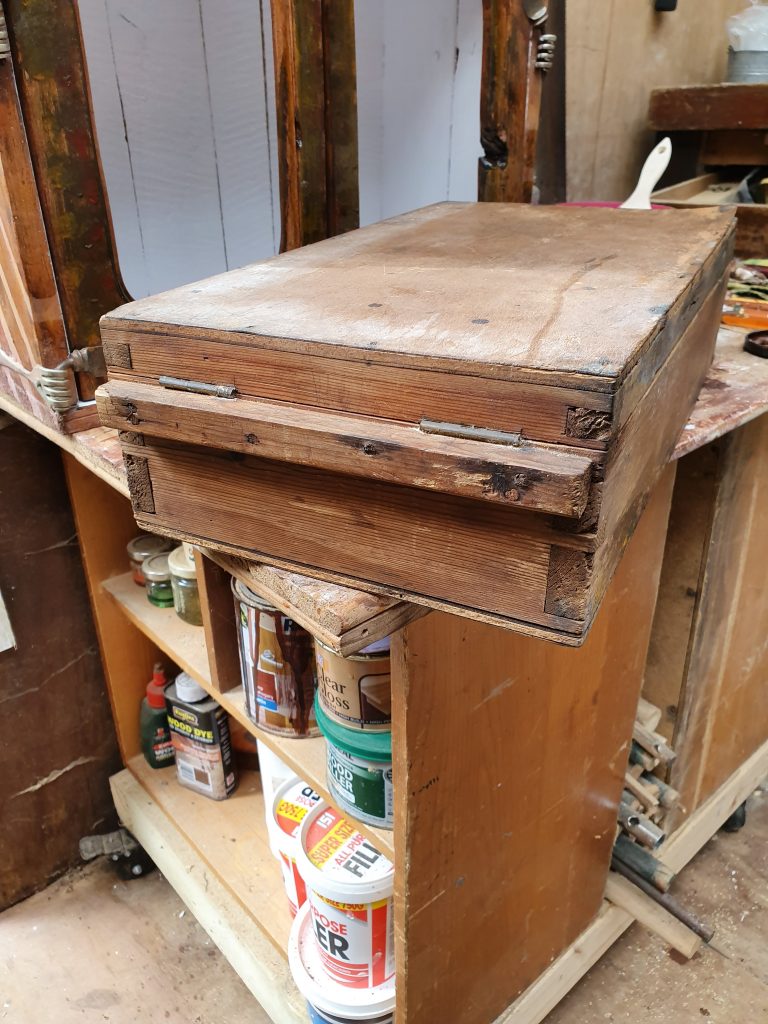
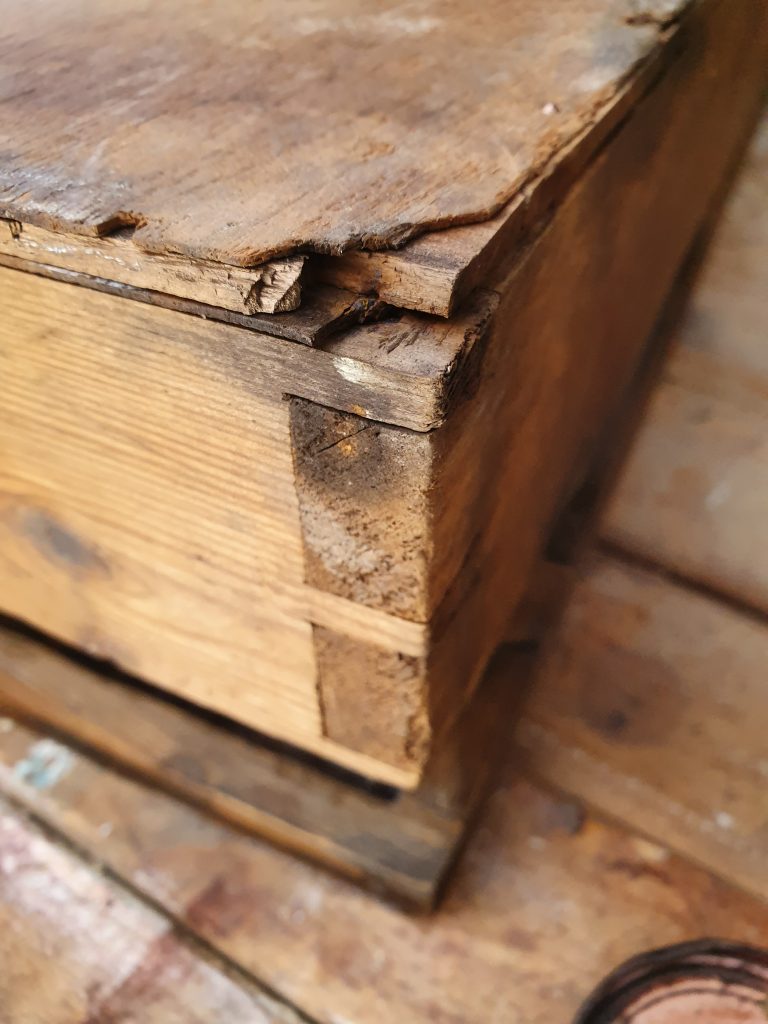
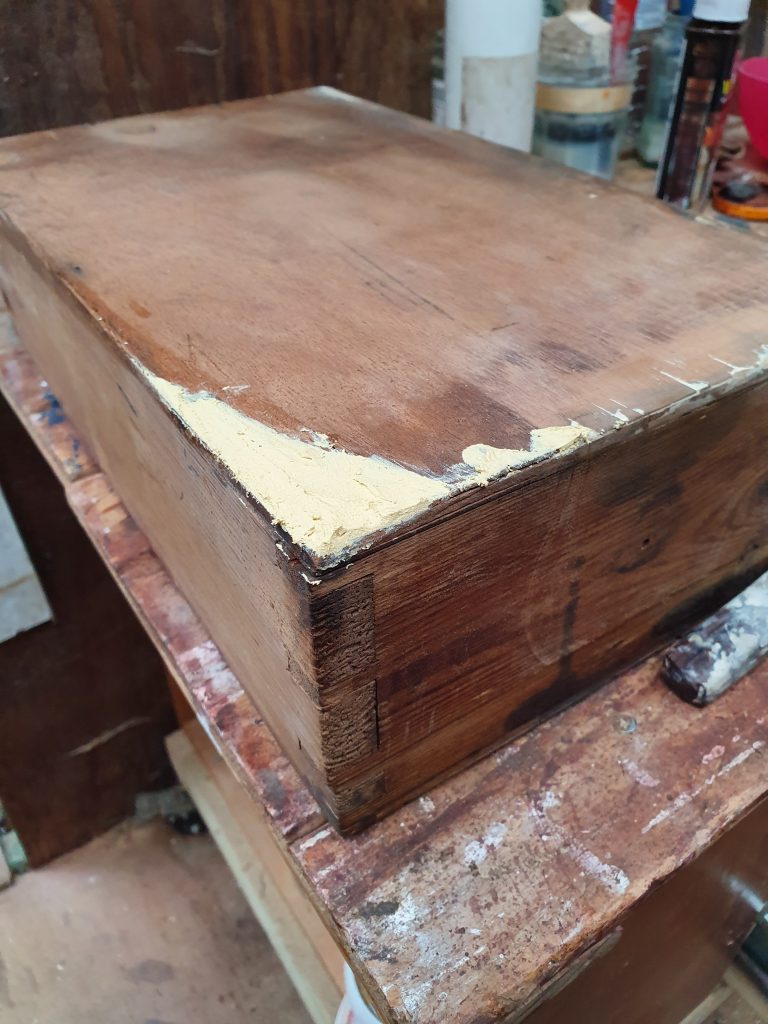
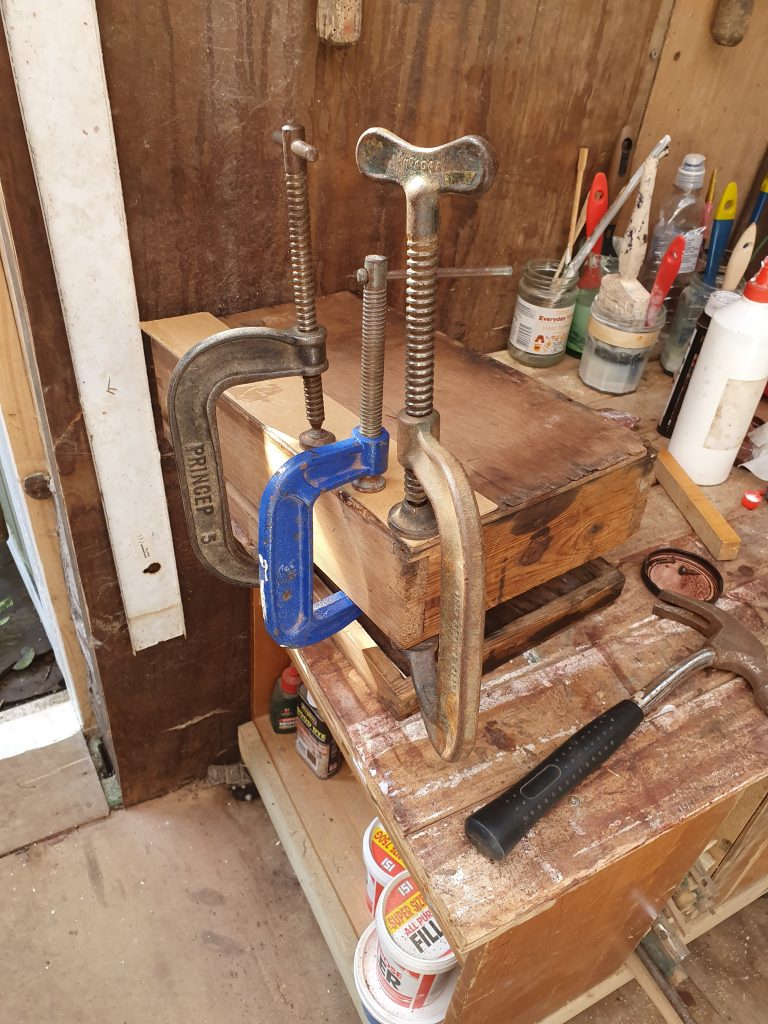
Box One – The shallow one, with the hook and eye catch. The first thing to do first was to see how deep the oil stains were. So a lot of sand paper and elbow grease was going to be needed here. Starting with some wire wool and various grades of sand paper, i eventually got through to the original grain of the wood, well mostly. After struggling to remove layers of grime i decided to move on to the hand sander, which helped less than expected. It was time to take my mind off it and attack the repairs on the damaged veneered corners instead. This hopefully, wouldn’t be such a challenge. Re-glued, filled and clamped up, i now just had to wait for it to dry so i could continue the sanding back.
The next day – I checked the veneer repairs and after the glue had dried properly, i gave the corners a light sanding back to match the rest of the wood. Now it was time to go back to the grind stone of removing the grime and stains from the rest of the wood. I eventually had to admit defeat, i was afraid if i sanded the wood back anymore, there may be nothing left but a box full of holes! Time to take a different approach.
The next day – I decided to consult with the client and let her know how it was getting on with the project. After telling her about the impossible to remove stains, we decided the next best thing would be to stain the wood to the colour of the stains instead. This would hopefully give an even looking finish to the wood.
We were right. I eventually got the finish i was looking for. Next i de-rusted and repainted the hook and reattached it to the eye and finally the box was in fully working condition. Now on to the next one.
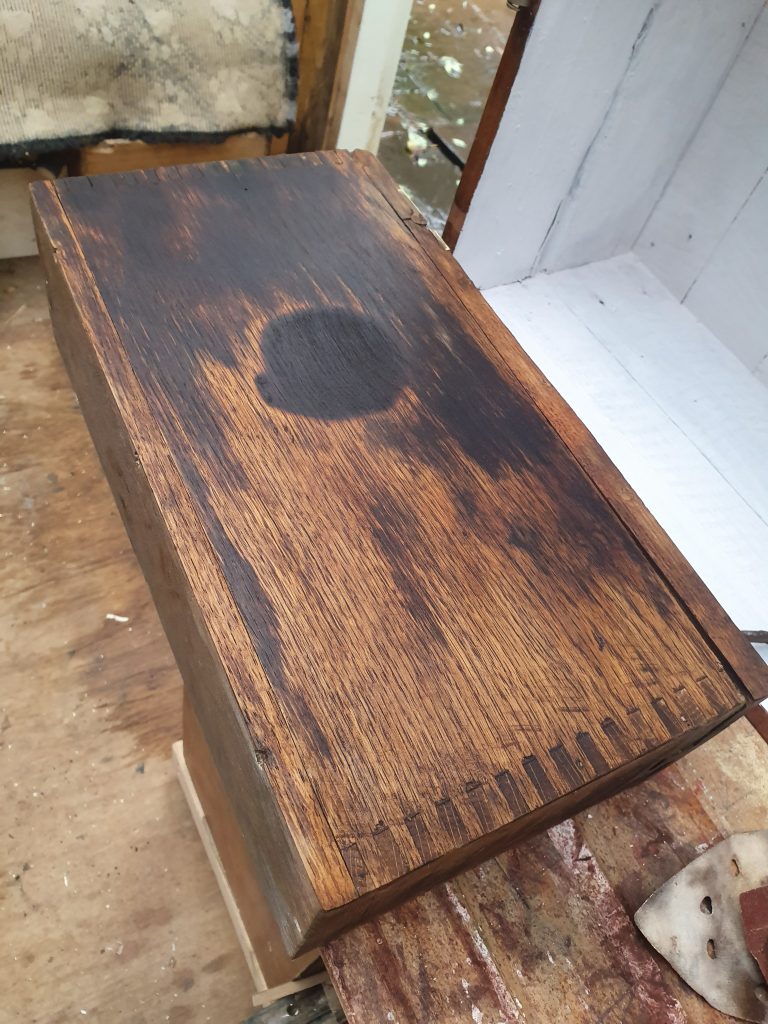
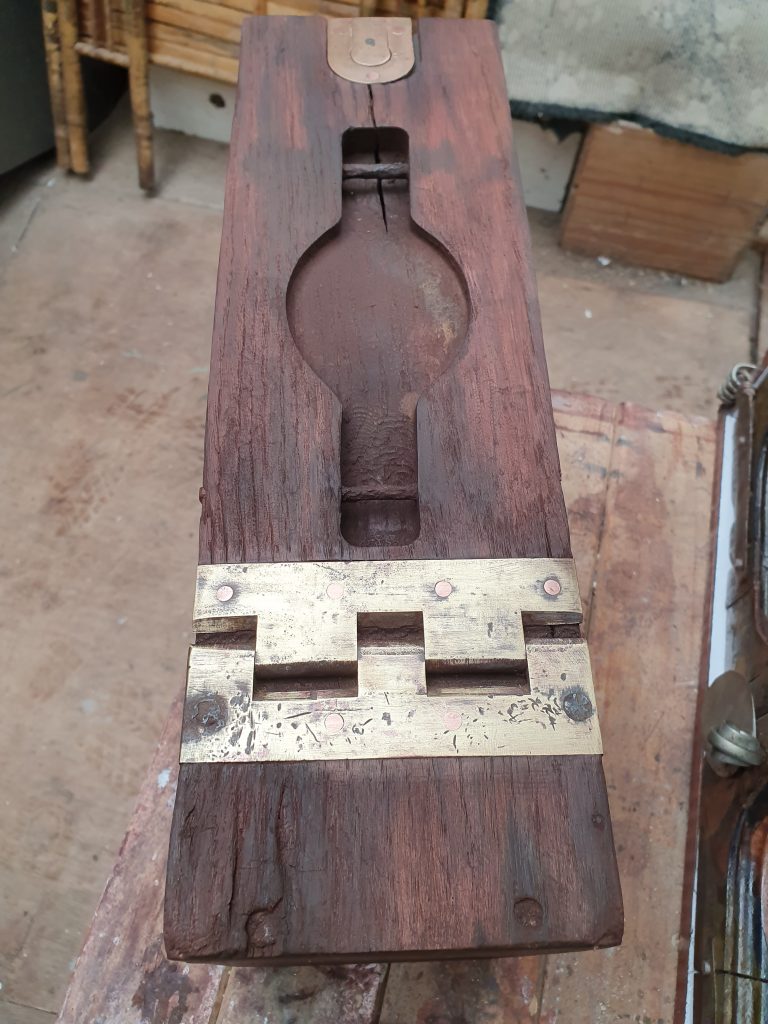
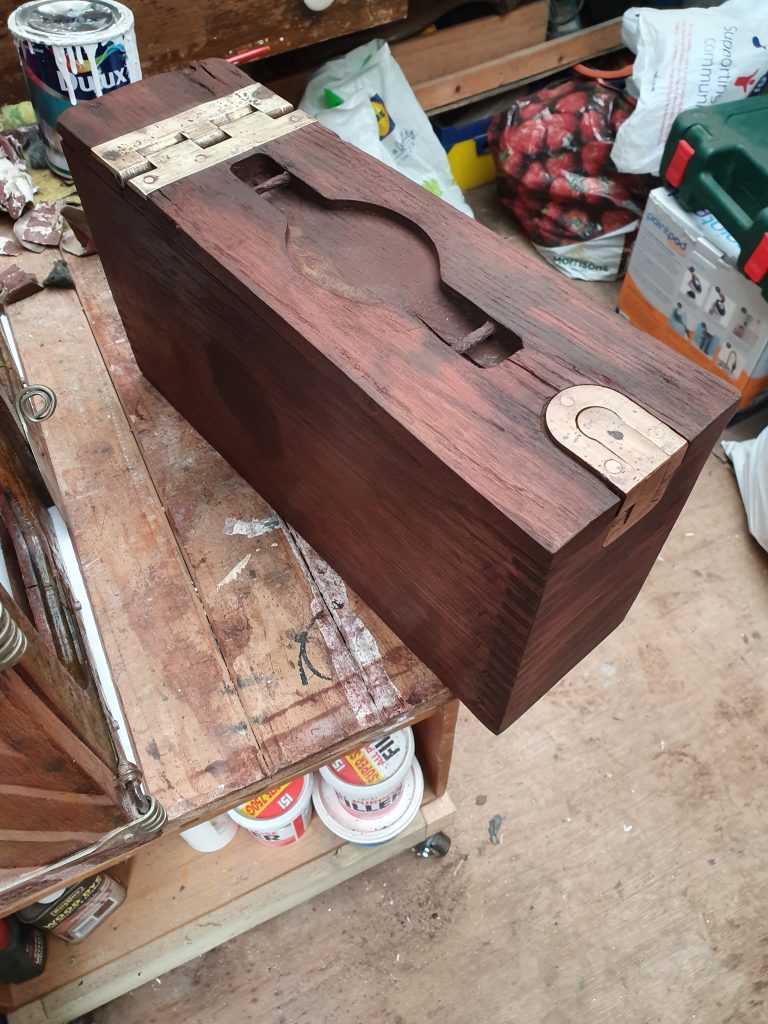
Box Two – The traditional looking one with loads of brass. Like before, the first task was to try and remove as much of the grime and stains from the wood as possible, but with the burn mark in the side too, it was not looking too good. After hours of sanding back the wood i eventually managed to remove some of the burn marks, but eventually i came to the realisation the wood would need staining to match like before. So be it.
The next day – Next it was time to clean and polish the brass hinge and lock. Firstly, using a very fine wire wool, i managed to remove the layers of grime. Then eventually with the use of some good old Brasso and some of my own elbow grease, i managed to get a great looking finish to the brass. My favourite bit of the job to be honest, very therapeutic indeed.
Final touches – The last thing to do was give both boxes a final thin layer of matt varnish. This eventually gave a satisfactory finish the both boxes and hopefully would lead to another satisfied customer.
I am pleased to say she was very happy with final results and thanked me for breathing new life into them. I said thanks for the opportunity to work with a little piece of history.
I wonder what she is using them for now….